Have you ever munched down on a fresh, home grown potato?There is a good reason why potatoes are one of the most popular vegetables in the home garden. They’re easy to grow, and they taste better!Potatoes were first cultivated by the Inca Indians in Peru, in about 200 B.C.In 1537, the Spanish Conquistadors discovered the potatoes and brought them back to Europe on their return trip. The first potatoes arrived in North America in 1621.Today, potatoes are one of the largest food crops in the world, with the United States alone growing about 35 billion pounds of potatoes every year.
Potatoes require full sun to grow. Because they are aggressively rooting plants, they will produce the best crop when planted in a light, loose, well-drained but moisture retentive loam. Potatoes prefer a slightly acid soil with a pH of 5.8-6.5. Fortunately, however, potatoes are very adaptable and will usually produce a respectable crop, even when the soil conditions are less than perfect.Potatoes should be rotated on a 3-year program. This means, you need 3-suitable sites if you want to grow potatoes every year.
Growing PotatoesPotatoes may be planted as soon as the ground can be worked in the early spring, but you must use good judgment. Potato plants will not begin to grow until the soil temperature has reached 45 degrees F. The soil should be evenly moist, but not wet or soggy. If the soil is water logged when you dig, not only will you risk “caking” the soil, your seed potatoes will probably rot before they even get started. Potatoes can tolerate a light frost, but you should provide some frost-protection for the plants when they are young. This can be a loose covering of straw, or a temporary plastic tent.
(Be sure to remove or ventilate the plastic on sunny days!) If you plan to store potatoes through the winter, you can plant a second crop as late as June 15.
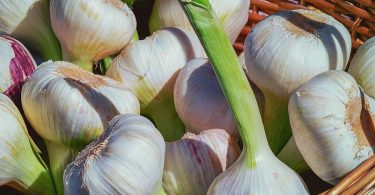
Use only certified seed potatoesPotatoes are susceptible to several serious diseases. Even though the potatoes you saved from the previous year, or the potatoes you see in the supermarket may appear healthy, they should not be used for your seed. Certified seed potatoes are disease free, and have been selected to give you the best results with the highest yields. Certified seed potatoes are available at most quality nurseries and garden centers. There are several different varieties of potatoes to choose from, each with it’s own characteristics and qualities. The most popular types are listed here. .
| Variety | Maturing | Comments |
| Yukon Gold | Early to Mid season | Large, yellow-fleshed variety. They are excellent baked, boiled, or mashed. The potatoes also store well. |
| Superior | Mid season | Good baked, boiled, or mashed. Resistant to potato scab. |
| Red Pontiac | Late maturing | High yields, large round potatoes, easy to grow, stores well. |
| Kennebec | Late maturing | Excellent producer, large potatoes, great for baking or frying, stores well. |
| Russet Norkotah | Late maturing | Excellent baking potato, excellent producer, large potatoes. |
| White Rose | Early to Mid season | Good producer, good for cooking, doesn’t store well. |
| Russet | Mid season | Excellent producer, excellent baking potato, large potatoes, excellent for storage. |
| Norland | Early maturing | Red skin, white flesh, excellent when boiled, fried, or mashed, stores well. |
Planting potatoesA week or two before your planned potato planting date, set your seed potatoes somewhere where they will be exposed to some warmth (between 60 and 70 degrees F.) and lots of light. This will induce them to begin sprouting. A day or two before planting, use a sharp, clean knife to slice the larger seed potatoes into “seeds”. Each seed should be approximately 1 1/2-2inches square, and must contain at least 1 or 2 “eyes” or buds. Smaller potatoes may be planted whole. In the next day or so, your seed will form a thick callous over the cuts, which will help to prevent it from rotting once planted.
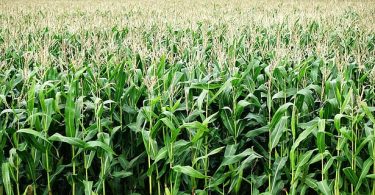
Potatoes in the Home GardenTraditionally potatoes are grown in rows. The potato seeds are planted every 15 in., with the rows spaced 2 1/2 to 3 ft. apart.If space is limited or if you would only like to grow a small crop of potatoes, you may prefer to plant one or two potato mounds. Each 3-4 foot diameter mound can support 6 to 8 potato plants.With either method, the first step is to cultivate and turn the soil one last time before planting, removing any weeds, rocks or debris. This will loosen the soil and allow the plants to become established more quickly. Your potato plants will benefit from the addition of compost, well composted manure, and other organic matter to the soil.
HOWEVER, too much organic material can increase the chances of potato scab. (Potato scab is a bacterial infection which doesn’t affect the usability of your potatoes, but it makes them look pretty ugly!) To lessen the likelihood of this, mix the organic matter into the soil below the potato seed, where it will feed the roots, but not contact the newly forming potatoes.
Planting in rows Dig a shallow trench about 4 inches wide and 6-8 inches deep. The spacing at which you place the seed pieces will determine the harvested potato size. For most household uses, you will want to plant your potato seeds 15 inches apart in this trench. If you’d like a quick crop of “baby” potatoes for soups and stews, you can plant the seeds 4 inches apart, and begin harvesting them as soon as they reach the desired size.Place the potato seeds into the trench (cut side down) and then cover them with 3-4 inches of soil. (Do not fill the trench in completely!) Depending on the soil temperature, the sprouts will begin to emerge in about 2 weeks. At this time add another 3-4 inches of soil.Your crop of potatoes will form between the seed piece and the surface of the soil.
For this reason, when the stems are about 8 inches high, you once again add enough soil to bring the level half way up the stem of the plant. Another hilling will be needed 2-3 weeks later, at which time you again add soil half way up the stem of the plant. After these initial hillings, it is only necessary to add an inch or two of soil to the hill each week or so, to ensure there is enough soil above the forming potatoes that they don’t push out of the hill and get exposed to light. (If the new potatoes are exposed to sunlight while they are developing, they will turn green. This green portion may be toxic!)
This hilling process is necessary to create sufficient space for the potatoes to develop large tubers, and an abundant crop. Don’t get carried away with hilling though… If you cover up too much of the foliage, you may end up reducing your final crop yield.
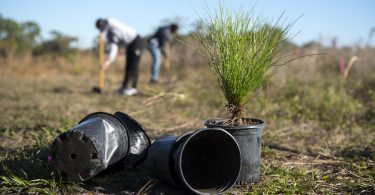
Mound plantingThe basic procedure for planting potatoes in mounds is the same as for planting in rows. The difference here is that you can grow your crop in a more confined area, or take advantage of an otherwise unused area of the garden.Cultivate and loosen the soil where your potato mound will be. Designate the approximate perimeter of your planting circle (3-4 feet diameter). Space 6-8 potato seeds evenly around your circle, and cover with the initial 4 inches of soil. Continue the same procedures as you would for planting in rows.
Potatoes without a gardenIf you have no established garden plot, or if there just isn’t enough available space within your garden, you can still grow a respectable crop of spuds, and do a little recycling at the same time. Potatoes thrive in the warm environment of a soil filled tire!Four tires + Two pounds of seed potatoes + Good soil = 20-30 pounds of winter potatoes!Pick a spot where you can stack your tires which is out of the way and preferably out of sight. Loosen the surface of the soil just enough to allow for drainage, and set your largest tire in place. Fill the inside of the tire casing loosely with good topsoil, and then set 3-4 potato seeds into the soil. (Use sticks or rocks to keep the casing rings spread open.)
Add enough soil to the tire “hole” to bring it to the same level as the soil inside the tire.When the new plants are eight inches tall, add another tire and soil to the stack, as in the first level. Repeat the process for your third, and if desired, fourth tires. As you add tires and soil to the stack, the 8″ of the plant stalk is covered with soil. By doing this, the existing stalk essentially reverts to a root status and the plant is forced to grow upward to once again find the sunlight which it needs. (much like if you were to try to eliminate a dandelion by covering it with a scoop of soil) By raising the soil level this way (in 8″ increments) the plant is able to continue growing without suffocation, and at the same time you are creating a 24-30″ tap root from which many more lateral roots can develop.
PATIO RAISED BED
A durable and modular way in which to grow potatoes and other vegetables where space is limited
Each lateral root can then produce additional potatoes (at 3-4 levels rather than the normal single layer). When you water, be sure that the soil is thoroughly moistened all the way to the base of the pile.The tires act as an insulator and heat “sink” for your potatoes. This added warmth will cause the lateral roots (where the new potatoes form) to multiply more rapidly, thereby giving you more potatoes.
Watering and careFor the maximum crop, keep your potato vines well watered throughout the summer, but especially during the period when they are in flower, and immediately thereafter. This is the time when the plant is creating the new tubers, and water is critical. Water early in the day so that the foliage has time to dry completely before evening. (Wet foliage can make your plants more susceptible to several potato diseases.) When foliage turns yellow and dies back, discontinue watering to allow the tubers to “mature” for a week or two before harvesting.Once the vines have passed the critical watering stage while in flower, they will tolerate a certain amount of drought.
According to some studies, non-irrigated potatoes are less watery and more healthful. However, potato plants which are not watered regularly will produce a much smaller crop.
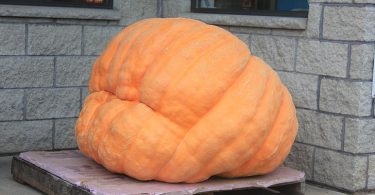
The Potato HarvestYour may begin to harvest your potatoes 2 to 3-weeks after the plants have finished flowering. At this time you will only find small “baby” potatoes if you were to dig up a plant. Potatoes can be harvested any time after this, by gently loosening the soil, reaching under the plant, and removing the largest tubers, leaving the smaller ones to continue growing.If you want late potatoes for storage, wait 2-3 weeks after the foliage dies back. Carefully begin digging a foot or so outside of the row or mound. Remove the potatoes as you find them. (Be careful not to bruise or cut the tubers with your spade!)
If the weather is dry, allow the potatoes to lay on the soil surface, unwashed, for 2-3 days so they can dry. If the weather is wet, or rain is expected, move the harvest to a cool, dry area (like a garage or basement) for the drying period. This drying step is necessary to mature the potato skin, which will protect the potato during storage.
If, by the end of September, the plants have not begun to die back, all of the foliage should be cut off to ensure your crop has ample time to mature before winter.Store your undamaged potatoes in a well-ventilated, dark, cool (about 40 degrees) location. Properly dried and stored potatoes should keep well for three to six months.
Don’t grow potatoes in the same soil more than once in three years. Many diseases and insect pests will survive and remain in this area, in spite of your best eradication efforts!
CREDIT BY : http://www.thegardenhelper.com/potato.html
https://gardener-pro-ok.blogspot.com/2008/09/how-to-grow-potatoes.html